Grinding and Polishing Zirconia: Choosing Diamond Burs and Rubber Polishers
Choosing the right zirconia polishing burs decides whether a crown leaves the lab smooth, accurate and strong, or rough, overheated and full of hidden micro-cracks. Zirconia is one of the hardest materials a dental technician works with, and the tools, the order you use them in and the way you hold the handpiece all matter. This guide explains how to grind, adjust and polish zirconia safely, from diamond grinders and cutting discs to rubber diamond polishers.
Why zirconia needs diamond tools
Fully sintered zirconia is extremely hard and dense. Ordinary steel or carbide burs dull quickly, chatter on the surface and generate a lot of heat without removing much material. Diamond is harder than zirconia, so a diamond tool cuts instead of rubbing. That means less pressure, less heat and a more predictable surface. The same logic applies to polishing: rubber polishers for zirconia carry diamond particles in the rubber, so they keep smoothing the surface instead of simply burnishing it.
Grinding before and after sintering
In general terms, it is easier and safer to do as much shaping as possible before sintering, while the zirconia is still soft and chalky. At this stage you can refine margins, open embrasures and smooth sprue attachment points with light hand pressure. Work gently, because the material is fragile before sintering and thin margins chip easily.
After sintering, adjustments should be limited to what is truly necessary: contacts, occlusion, small corrections at the try-in stage and final finishing. Every adjustment on sintered zirconia removes hard material, creates heat and leaves a rougher surface that then needs to be polished again. Good design and careful preparation before the sintering cycle reduce the amount of grinding you need afterwards.
Cutting discs for sprues and connectors
The first step after milling is usually separating the restoration from the disc. A thin diamond cutting disc lets you cut through sprues and connectors cleanly without twisting the restoration. The FD2230 cutting disc is a coarse disc with a 22/0.3 size designation and a maximum speed of 50,000 rpm. Cut close to the restoration but not into it, support the work firmly and let the disc do the work instead of forcing it. Never use a cutting disc sideways as a grinder, and always wear eye protection. You can see the full range in our cutting discs category.
The grit sequence: coarse to high gloss
The most important rule in finishing zirconia is to work from coarse to fine and never skip a step. Each grit removes the scratches left by the previous one. Jumping straight from a coarse grinder to a fine polisher leaves deep scratches under a shiny surface, which looks good at first and fails later.
- Coarse: shaping and reduction. Use a diamond turbo grinder to remove sprue remnants, correct contours and adjust occlusion. Our grinding burs, such as RL01 and the rest of the RL series, are described as diamond turbo grinders for rapid reduction, moulding and finishing of zirconia and aluminum crowns, and for fast finishing of porcelain.
- Coarse rubber polishing: removing grinding marks. Start rubber polishing with the blue (coarse) PDH polishers, PDH 011 or PDH 031, to take out the scratches left by the grinder.
- Medium: smoothing. Move to the red (medium) polishers, PDH 012 or PDH 032. The RD043023 polishing bur, a medium-grit bur, is another option for smoothing at this stage.
- Fine: pre-polish. Finish with the yellow (fine) polishers, PDH 013 or PDH 033, until the surface looks uniformly smooth with no visible scratches.
- High gloss. If you want a mirror finish, follow the fine step with a dedicated high-gloss polishing system or polishing paste, as recommended by its manufacturer.
PDH rubber diamond polishers at a glance
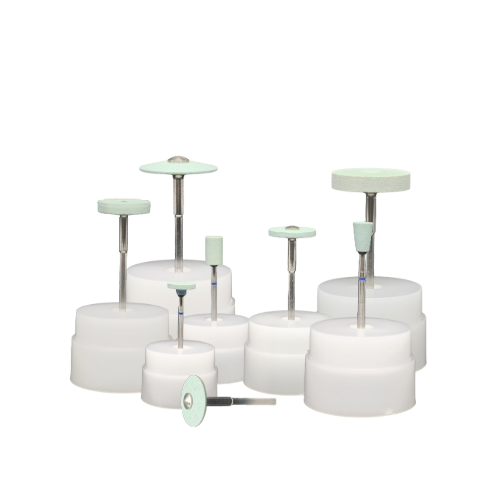
The PDH dual rubber diamond polishers are made for smoothing and polishing zirconia, porcelain and precious metal, with a high diamond concentration. They are color coded by grit and come in two size designations:
| Grit (color) | Size 26/2 | Size 22/3 | Max speed | Use in the sequence |
|---|---|---|---|---|
| Coarse (blue) | PDH 011 | PDH 031 | 20,000 rpm | Removing grinding marks |
| Medium (red) | PDH 012 | PDH 032 | 20,000 rpm | Smoothing |
| Fine (yellow) | PDH 013 | PDH 033 | 20,000 rpm | Pre-polish before high gloss |
Speed, cooling and pressure
Heat is the main enemy when grinding sintered zirconia. Local overheating can create micro-cracks and stress in the surface that you cannot see, but that weaken the restoration over time. Three habits keep heat under control:
- Never exceed the maximum speed of the tool. Each tool has its own limit. In our range, the RL grinders are rated between 10,000 and 30,000 rpm depending on the model, the PDH polishers at 20,000 rpm, the RD043023 bur at 10,000 rpm and the FD2230 disc at 50,000 rpm. Always check the speed printed on the tool’s packaging before you start.
- Cool the work. Use water spray or air cooling where your setup and the tool allow it, and pause regularly so the restoration does not build up heat. If the zirconia feels hot to the touch, stop.
- Use light pressure and keep moving. Let the diamond cut. Pressing harder does not remove material faster, it only adds heat and wears the tool. Keep the bur moving over the surface instead of holding it in one spot.
Shaping contacts and occlusion
Check proximal contacts and occlusion on the model with articulating paper or foil, then adjust only the marked areas with a fine-tipped grinder. Remove small amounts at a time and check again, because you cannot add zirconia back. Avoid thinning connectors on bridges and avoid sharp internal angles, as both concentrate stress. After any adjustment, the ground area must go through the full polishing sequence again. A rough contact or occlusal surface can wear the opposing tooth and collect plaque.
Polish or glaze?
Glazing adds a thin glass layer that looks glossy, but it can wear away in the mouth and expose the zirconia underneath. If the surface was not polished first, what is left behind is rough. A well-polished zirconia surface stays smooth because the shine comes from the material itself. Many labs therefore polish occlusal and contact areas carefully, and then glaze or not depending on the case, the material and the clinician’s request. Either way, polishing comes first: glaze should never be used to hide grinding marks.
Tool care and replacement
- Clean burs and polishers after use to remove zirconia dust and debris, following the cleaning instructions for each tool.
- Store tools in a bur stand so diamond surfaces do not knock against each other.
- Keep a separate set of polishers for zirconia so they are not contaminated with metal or other materials.
- Replace a tool when it cuts slowly, needs more pressure, runs out of true, or when a rubber polisher is worn down or deformed. A worn tool produces more heat than a new one.
Common mistakes to avoid
- Skipping grits and going straight from coarse grinding to fine polishing.
- Grinding dry with heavy pressure, which overheats the zirconia and risks micro-cracks.
- Running tools faster than their rated maximum speed.
- Doing major shaping after sintering that could have been done on the soft material.
- Thinning connectors while separating sprues or adjusting bridges.
- Using glaze to cover a rough, unpolished surface.
- Using worn tools for too long to save on replacements.
Finishing burs and polishers from Aqras Medical
Our finishing burs range covers each step of the workflow: the FD2230 cutting disc for separating sprues and connectors, RL diamond turbo grinders for shaping and adjustment, the RD043023 polishing bur, and PDH rubber diamond polishers in coarse, medium and fine grits.
Need burs, polishers or cutting discs for your lab? Add the items to your quote request or message us on WhatsApp, and we will reply with availability and a quotation.
Frequently asked questions
Why can’t I use regular burs on zirconia?
Sintered zirconia is very hard. Regular burs dull quickly and create heat without cutting well. Diamond tools cut zirconia efficiently with less pressure and less heat, which protects the restoration.
What is the correct polishing sequence for zirconia?
Work from coarse to fine without skipping steps: shape with a diamond grinder, then use coarse, medium and fine rubber diamond polishers, and finish with a high-gloss polishing step if a mirror finish is needed.
What speed should I use for zirconia polishing burs?
Never exceed the maximum speed printed on the tool’s packaging. For example, the PDH rubber polishers are rated at 20,000 rpm and the RD043023 polishing bur at 10,000 rpm. Use light pressure and keep the tool moving.
Is it better to polish or glaze zirconia?
Polishing should always come first. Glaze can wear away in the mouth, so a well-polished surface underneath stays smooth. Whether to glaze afterwards depends on the case and the clinician’s request.
When should I replace a diamond bur or rubber polisher?
Replace it when it cuts slowly, needs more pressure, vibrates or runs out of true, or when the rubber is worn down or deformed. Worn tools produce more heat and increase the risk of micro-cracks.